Step-By-Step Guide To Connect Brother MFC7840W To WiFi
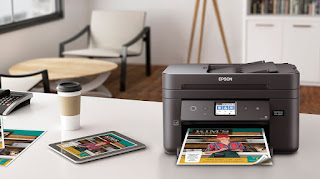
Brother MFC7840W printer is a multi-function printer, it is a printer, copier, scanner and faxer all-in-one. So many features in one, isn’t that just amazing? It’s a compact printer making it a total yes for small spaces. The efficiency of these printers is another cherry on the cake. It’s printing speed is 23 pages/minute. But, all these benefits are accessible only when you connect it to the wifi network. In this article we will discuss how to connect Brother MFC7840W to wifi and start printing wirelessly. Let’s now dive deep into the connection process.

Guide To Wireless Connection Of The Brother MFC7840W Printer:
Before beginning with the wifi connection, ensure that you have noted down the network name and password of your wifi router mentioned at its bottom. You will need these two while setting up the printer to your wifi network.
- Ensure to keep the printer and wifi router in close vicinity and that there are not many products in between the two.
- Now, connect the power cord from the printer to the power supply socket and turn the printer by pressing the power button.
- Now, use the up and down arrow keys on the control panel to scroll through the various options;
- Firstly, choose the Network or Lan and confirm by pressing OK.
- Then, choose the WLAN option and confirm similarly by pressing the OK button.
- Follow by choosing the Setup WLAN option and press OK again.
- This will direct you to the Setup Wizard page, choose the Setup Wizard option and tap on OK.
- After a few moments, a ‘Network I/F switched to wireless’ option will appear on your screen. Enable the wireless network when this prompt appears. Now, this starts the Setup Wizard.
- After searching for the available wifi networks, your Brother printer will show a list of available SSIDs.
- Choose your wifi network from the enlisted networks.
- After selecting the wifi network, scroll through the options by using up and down arrows to choose Infrastructure option and press OK.
- Then, select the Open System option and hit the Ok button. Select None when it asks for your encryption type and confirm by pressing OK. The settings will apply after you have completed filling the option.
- In case, it asks for the WEP encryption then navigates to the Open System feature and confirms by selecting OK.
- When asked to choose for preference for encryption type choose WEP from the enlisted options and select OK.
- After choosing the key number press OK.
- Type the network key when WEP key is asked for and hit OK.
- Press the OK button once again to apply these settings.
- In case the system asks for authentication along with WEP encryption then navigate to Shared Key and hit OK.
- Proceed by selecting the appropriate key and selecting the OK button again.
- Again enter the WEP key and hit OK.
- Press OK again to apply these settings and choose Yes.
- In case of an authentication leap navigate to the Leap button and hit OK.
- Then type in the username and hit the OK button.
- Again enter the WEP or network key and shoot the OK button.
- Now, Brother printers will again start looking for wireless connections.
- You will see a prompt telling whether the connection is successful or not.
MFC7840W Connected To Wifi!

Now you will be able to connect Brother MFC7840W to wifi without any hassle. A detailed setup process has been given above. Just keep following the steps carefully and you will be able to establish the connection. Though these steps are quite helpful, if you get stuck at some point we are always ready to lend a helping hand. Call on our number for technical guidance from our experts.


Comments
Post a Comment