How To Perform the Canon Selphy Cp1300 Wireless Setup?
Canon is a famous brand of printers which grabs the attention of many people throughout the world. Most of the Canon printers are known as All-in-one printers by using which you can print, copy, scan and fax at a time. There are many companies that design the excellent quality of the printers wherein Canon printer models hold the maximum attention. Although all the Canon printers are famous for their remarkable performance but still some people may face technical glitches while using them. If you want help with the Canon Selphy cp1300 Troubleshooting, then directly reach out to the highly skilled technicians. You may also visit the official website of Canon to learn more about it.
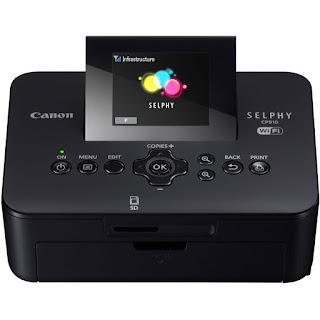
Step By Step Guide To Perform the Canon Selphy Cp1300 Wireless Setup
If you want to connect the Canon selphy cp1300 with other devices, the wireless setup requires to be established. Here are the simple steps to perform a wireless setup as follows:
- Turn on the Canon Canon Selphy cp1300.
- Now keep pressing the Wireless button until the indicator light is blinking.
- Once the indicator light near the Wireless button will now show a blue light. You can now hold the WPS button on the access point for a few minutes.
- You can see that the WiFi indicator lamp starts blinking which indicates that the printer will now start searching for the available network.
- You can now hold on till you will see the Power lamp.
- Then the WiFi indicator lamp will now start blinking together.
- You can see that now the printer has successfully established a successful connection.
- Finally, the Wireless & power indicator will now stop blinking.
Quick Guide To Connect Canon Selphy Cp1300 with the WiFi
- The initial step is to check if the access point is now ready for communication.
- You can now remove the memory card from the Canon selphy cp1300.
- In the next step, open the Setting screen.
- Tap on the WiFi settings.
- Select the Connection Method through the Wi-Fi Network.
- You can now access the Direct Connection.
- By using the arrow buttons and choose the WPS Connection.
- Now under the WPS Connection, you need to find the PBC Method. Then click on it.
- Then press the access point button.
- You need to keep pressing the WPS button.
- As soon as the connection to the Access point message is now displayed. Then tap on the ok button.
All the steps given above are easy to use. If you will face any problem then directly reach out to highly skilled professionals.

Still unable to perform the Canon Selphy cp1300 Troubleshooting? If yes, then you can directly take the help of the best technical experts. We have technicians who use the best possible ways to resolve the common problems of the Canon printer. They use amazing techniques that will surely resolve your common issues. The availability of our technical team members are 24*7 hours; feel free to dial our helpline number. Approach us and get rid of all the common Canon Printer related issues.


Comments
Post a Comment